
- 5 large russet potatoes, scrubbed clean
- 2 large eggs
- 1 tablespoon extra-virgin olive oil
- 1 1/2 cups unbleached all-purpose flour
- 1 teaspoon kosher salt
- That's it!
What a wonderful way to spend an evening! Nathaniel and Amanda asked me to teach them how to make gnocchi, a soft dumpling made out of potato, eggs, olive oil, flour and salt. When we have time, we sometimes make homemade pasta, too! And, boy, is it fun! Tonight we all gathered in the kitchen where I showed them just how easy and fun gnocchi is to make. I’ve often read how difficult and tricky making gnocchi can be and I was aware that too much liquid will make for a gummy gnocchi and too much flour will make them too dense and heavy on the stomach. We were trying to make a light, plump gnocchi and we succeeded! I gave us all an A+! I will honestly tell you that we found it quite easy and very enjoyable.
With just a few tips, you too, can make these delicious soft dumplings in no time flat. We love eating our gnocchi with pesto, but I have also tossed these light and delicate beauties in a brown butter sauce which is equally delicious.
In my own experience, cooking and eating together strengthens and nurtures relationships quicker and stronger than any other way. My mission has always been to inspire families to connect in their kitchens and around their tables. It warms my heart to see my son Nathaniel and my future daughter-in-love, Amanda, creating meals and making memories together. Just as the subtitle of my new book You Never Cook Alone suggests we’re “stirring memories, feeding souls and building legacies!”
Here’s how easy making gnocchi was:
1. We began by boiling 5 large russet potatoes with the skins on for about 45 minutes. We only needed four large potatoes, but I added an extra one. Why did I do that? So that I could stick a knife in it to see when all of the potatoes were done. It is very important to use dry, not wet, potatoes in your gnocchi dough and that is why I left the skins on. Water has a difficult time penetrating the skin. In addition if I continually poke or stick a knife or fork in the potatoes, the water will penetrate the potatoes and make for a wet dough. We definitely do not want that! That does not make for a good gnocchi!
2. Next we peeled the skin off using a fork or knife. This is a great time to have asbestos fingers because it makes peeling the skins off while the potatoes are still hot much easier! Once all of your potatoes are peeled, place them through a potato ricer if you have one. You do not own a potato ricer? Funny, neither do I! I haven’t decided if I need one or not. Amanda and I had no problem placing our potatoes in a large mixing bowl and mashing them up with a fork. We did take our time to mash them thoroughly however. We made certain we did not have any lumps. A lumpy gnocchi dough does not make for a delicate ending and it makes rolling these little guys difficult.

3. In a small bowl whisk together the eggs and the olive oil.

Add to your potatoes and mix thoroughly.

4. In another bowl, combine your flour and salt. Add to your potato mixture and stir just until combined. You are really just combining it enough to make kneading easier.
5. Knead your gnocchi dough on a clean, lightly-floured surface. Resist adding more flour and kneading too long. About a minute will do! Adding too much flour will make your gnocchi very dense and heavy — that’s a no – no!

6. Gently pull off a piece of dough about the size of a lemon and roll into a rope shape.

Amanda and I found that placing a little pile of flour on our board or counter and running our knife through it before cutting into our dough helped.

Cut one-inch pieces of your dough.

All of your gnocchi have been cut…

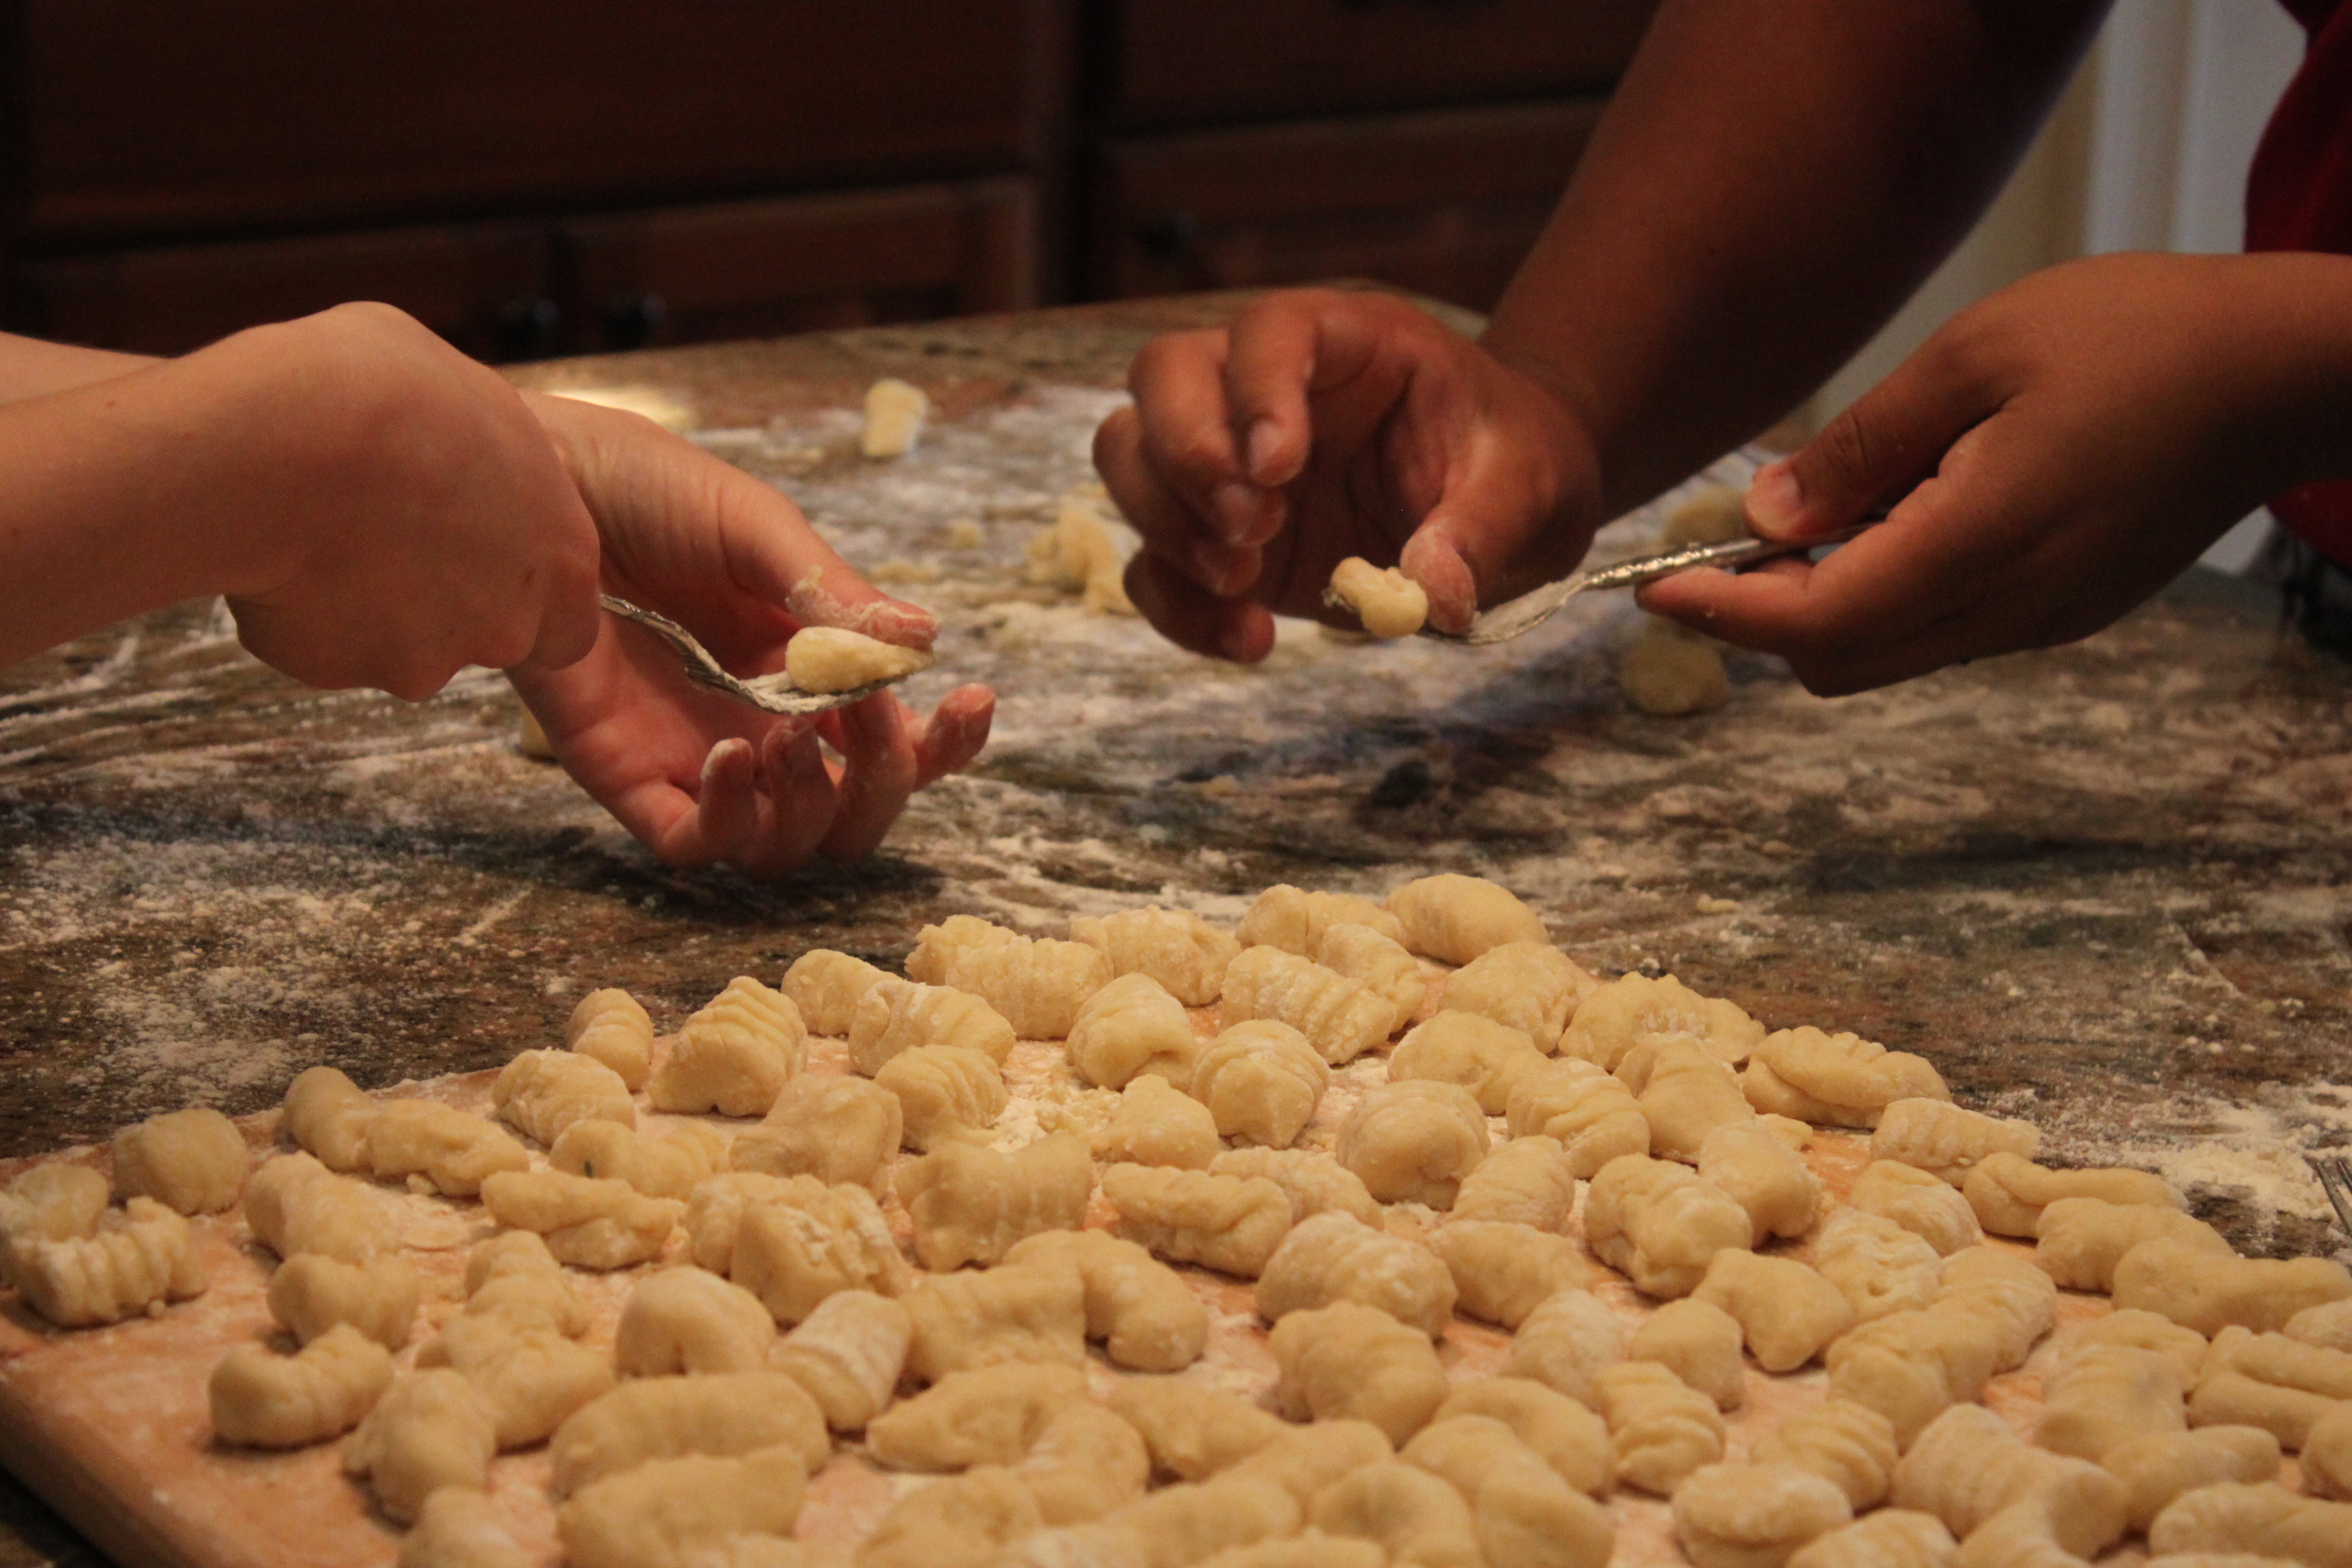
7. Next roll your gnocchi. See Amanda on the left gently pressing down on the gnocchi dough with her thumb and then you can see Nathaniel on the right gently rolling his gnocchi away after making his thumb imprint. This picture warms my heart by the way!

If you are like me, I learn by watching. So here’s a great video from Food Nouveau showing two different ways to roll gnocchi.
As you roll your gnocchi be sure to arrange them in a single layer on your counter, making certain they do not touch.
If you’d like to freeze your gnocchi to enjoy at a later time, simply place them on baking sheets (again in a single layer) straight into the freezer. Once hard, transfer them to freezer bags. You can even divide them into portion sizes if you do not want to cook them all up at the same time! Your gnocchi will keep for up to two months. This is also how I freeze blueberries!
8. Lastly, bring a pot of salted water to a boil and carefully drop in your gnocchi. As not too overcrowd the pan, we did this in three batches. Don’t panic when you see your beautiful gnocchi drop to the bottom of your pan and certainly do not walk away or get distracted. It will only take about a minute before they float up to the top. Once they have immersed from the deep, allow them to boil away for one minute more.

I hope you make this with someone special or a group of family and friends! When you do — Congratulations! It wasn’t as bad as you thought, right? You should be proud of yourselves, sit down and enjoy this uncomplicated, easy, delicious and fun recipe with your family!

We enjoyed our gnocchi with Lemon Garlic Herb Chicken and our Back in the Day Wedge Salad with an Outrageous Cucumber Ranch Dressing!


From our hearts to yours,
Elise and family
 Hello, I’m Elise Johnson and I’m so glad you found your way here! From my own experience, cooking and eating together as a family nurtures and strengthens family relationships quicker and stronger than any other way. Join me as I continue my grandmother’s legacy of
inter-generational cooking by inspiring families and friends to make memories in the kitchen.
Hello, I’m Elise Johnson and I’m so glad you found your way here! From my own experience, cooking and eating together as a family nurtures and strengthens family relationships quicker and stronger than any other way. Join me as I continue my grandmother’s legacy of
inter-generational cooking by inspiring families and friends to make memories in the kitchen. 